Saturday, February 27, 2010

On a Pedestal Card

Thursday night, I helped my new recruit, Aliesha, with her first workshop. I can't say that I helped much, because she really did it all. I was there more for support. She called me her "stamping fairy godmother". (smile) Aliesha did a fabulous job for her first time and I know she's off to a great start! Here is the make and take project that she came up with. Isn't it cute!?

I always offer to help my new recruits with their first workshop -- whether it's helping to prep over the phone, actually doing part or all of the first workshop, or just being a fairy godmother who is there for support. I'd love to help you start your own business! Click here to read more about becoming a demonstrator. Sign up by the end of March and you'll get 15% off your Starter Kit PLUS a Free Stamp Set (any price), and a special bonus gift from me (Sweet Pea Designer Paper Stack and Stitched Felt!) Click here for all the details.

Supplies: On a Pedestal, Bermuda Bay ink & cardstock, Rose Red marker & cardstock, Chocolate Chip ink/marker & cardstock, Whisper White cardstock, Real Red marker, Scallop Trim Border Punch (SAB), 1/4" Rose Red Grosgrain Ribbon

Click HERE to Order Stampin' Up! Products Online, Anytime!

Friday, February 26, 2010

Hi There Little Bear Card

I squeezed in a card this afternoon instead of cleaning up my stamp room...or getting ready for my workshop this weekend. Sometimes you just need to create, know what I mean? I pulled the color combination from Stacey's Curtain Call Color Challenge Act 18 for this cute Build-a-Bear card.

I paper-pieced the pants (from DSP) and the shirt (colored with blender pen and ink pads). I added some texture to the Kraft cardstock on the side by crinkling and splitting the paper (Faux Suede technique) in half. Here's a close-up so you can see the texture and raised elements on the card:

Supplies: Beary Best Friends, Fundamental Phrases, Jet Black Staz-On ink, Night of Navy ink & cardstock, Old Olive ink & cardstock, Whisper White Craft ink & cardstock, Kraft cardstock, Sahara Sand marker, Pawsitively Prints DSP, Blender Pen, Kraft Corduroy Buttons, Mini Glue Dots, Stampin' Dimensionals

Click HERE to Order Stampin' Up! Products Online, Anytime!

"With All My Heart" Card Contest

It's time for another card contest! I've designed make and take projects for our annual Spring into Stamping Demonstrator Event on March 13. We're using the "With All My Heart" stamp set from the Occasions Mini catalog and I'd like to put together a display board with more samples using this stamp set. To help populate that display board, I'm holding a card contest!

"With All My Heart" Card Contest

Send me card fronts or 6x6 scrapbook pages made using the "With All My Heart" stamp set from the Occasions Mini Catalog. (Sorry, cards will not be returned.) I'll have my husband pick his favorite and the winner will get the Whimsical Wings Card Kit (cards only, no stamps; a $12.95 value). I will create cards using this kit and the With All My Heart stamp set to inspire you to think beyond the butterflies!

There is no limit to the number of cards that you may submit.

Deadline: All cards must be received no later than Thursday, March 11.

The winner will be announced and posted on my blog on Saturday, March 13.

Please mail cards to:
Julie Davison
2905 Maplewood Drive
Champaign, IL 61821

I look forward to seeing your fabulous cards!

Click HERE to Order Stampin' Up! Products Online, Anytime!

Thursday, February 25, 2010

Happy Birthday....A Little Late

I'm working on some more belated birthday cards today and made up this one with the cute Fox and Friends set. Turtles are known to be slow, so I thought it was appropriate on a belated card. On the inside, I'll write, "Sorry I'm so slow..."

Supplies: Fox and Friends, On Your Birthday, Garden Green ink & cardstock, Certainly Celery marker & cardstock, Whisper White cardstock, Kaleidoscope DSP, Scallop Circle Punch, 1-3/8" Circle Punch, Sherbet Designer Buttons, Stampin' Dimensionals

Click HERE to Order Stampin' Up! Products Online, Anytime!

Wednesday, February 24, 2010

Bird on a Branch Square Card

Here is the last of my February Stamp Club projects. We used the Scallop Trim Border and Corner punches to make this fancy square card. Click here to another project using these punches and some helpful hints, including a video from Stampin' Up!.

I love the soft spring colors on this card. I took the color combination from the beautiful Sweet Pea Designer Series Paper Stack (#117161). It's such a great value -- 48 sheets for only $24.95!

The finished card size is 4-1/4" x 4-1/4".

Supplies: Teeny Tiny Wishes, Whisper White cardstock, Soft Suede ink, Bashful Blue cardstock, Kraft cardstock, So Saffron cardstock, Mellow Moss cardstock, Sweet Pea Designer Series Paper Stack, Two-Step Bird Punch, 1/4" Mellow Moss Grosgrain Ribbon, Scallop Trim Border & Corner Punches, Stampin' Dimensionals

Click HERE to Order Stampin' Up! Products Online, Anytime!

Tuesday, February 23, 2010

CAS Butterfly Notecard

This card is the definition of Clean and Simple (CAS)! I used the Small Notecards and Envelopes (#107311, $5.95) again to create these simply beauties as my answer to catching up on belated February birthday cards. I think the glitter on the butterflies is just the perfect touch to make this card sparkle!

Trying to figure out where that "happy birthday" stamp came from? I omitted most of the image...it's from the "On Your Birthday" set!

Supplies: On Your Birthday, Beautiful Wings Embosslit (Big Shot), Orchid Opulence cardstock, Certainly Celery cardstock, So Saffron cardstock, Jet Black Staz-On Ink, Small Notecards and Envelopes, Stampin' Dimensionals, 2-Way Glue, Dazzling Diamonds Glitter

Click HERE to Order Stampin' Up! Products Online, Anytime!

Monday, February 22, 2010

Baby Shower Thank You Cards

As part of my friend's baby shower gift, I made up a set of thank you notes. They came together really fast using the pre-cut Notecards and Envelopes (#107311, $5.95) and the layered circle punches. I stamped the same rattle on the envelopes to match and packaged them up in a cello bag with a cute ribbon.

Supplies: Thank You Kindly**, Holiday Blitz, Pretty in Pink ink & cardstock, Apricot Appeal marker & cardstock, Whisper White cardstock, Kaleidoscope DSP, 1-1/4" Circle Punch, 1-3/8" Circle Punch, Scallop Circle Punch, 2-Way Glue Pen, Dazzling Diamonds Glitter

** You can get Thank You Kindly for FREE during Sale-a-bration with a qualifying order or workshop! Click here for details.

Click HERE to Order Stampin' Up! Products Online, Anytime!

Sunday, February 21, 2010

Onesie Baby Shower Card

I attended a baby shower this afternoon for my good friend Mary Beth. She's my pregnant pal (due just six weeks before me) so we often commiserate and help each other out. It was so nice to spend the afternoon with other women and celebrate the upcoming arrival of Mary Beth's first daughter (she has two sons). EVERYTHING was pink; it was great!

Here's the card I made to go with her gift. It was pink too, of course!

Click here to see another onesie card I made and for a link to the instructions to make one yourself.

Supplies: Pretty in Pink ink & cardstock, Whisper White cardstock, Kaleidoscope DSP, 1-1/4" Circle Punch, 1-3/8" Circle Punch, Scallop Circle Punch, Scallop Edge Punch, Heart to Heart Punch, 2-Way Glue Pen, Dazzling Diamonds Glitter, Perfect Polka Dots Impressions Folder (Big Shot), Silver Brads, 1/16" Hole Punch

Click HERE to Order Stampin' Up! Products Online, Anytime!

Spring Into Stamping Sneak Peek

If you live in central Illinois...or any part of Illinois...or neighboring states...heck, you're welcome to come no matter where you live! We're holding our annual Spring Into Stamping Demonstrator Event next month and I invite you to join us! This event is hosted by the ImPeckable Stampers and open to all demonstrators -- or guests who are interested in learning more about the demonstrator opportunity! This year, I have the honor and privilege to once again design the make and take projects. And not to boast, but you're gonna love 'em! Here's a little sneak peek:

We'll be stamping and sharing all day on Saturday, March 13 in Champaign, Illinois -- literally a mile down the road from my house! I hope you'll join us if you can. Click here for all the details and to register for this event. Registration closes in just FIVE days, so make sure to sign up soon!

Click HERE to Order Stampin' Up! Products Online, Anytime!

Saturday, February 20, 2010

Simply Adorned 1" Charm Swap

I participated in a swap for Simply Adorned charms. I can't wait to get them back and see what everyone else came up with. This was a prototype for my 1" charm swap. I forgot to take a picture of the final swap before I mailed it. I ended up dropping the pleated cardstock and stuck with a simple rub-on matched with the flower.

Supplies: Eggcellent Eggs Kit (rub-on and rhinestone), Cottage Wall DSP, Rich Razzleberry cardstock, Palm Plum cardstock, Whisper White cardstock, Trio Flower Punch, 1/4" Circle Punch, Mini Glue Dots

Click HERE to Order Stampin' Up! Products Online, Anytime!

Basket & Blooms Pouch

I never made it off the couch last night to share a project with you, so it looks like I owe you TWO tonight! The first one is another project for Stamp Club. We used the Baskets & Blooms die to make this little pouch that is perfect for holding a small candy/chocolate or a gift card. Or you could tuck a small note in there.

The die comes with other pieces, including a tag, flower, and a sunburst piece that is supposed to be the bottom of the basket. (Click here to see another project using this die.) For this pouch, we omitted the bottom piece and just used sticky strip to put it together flat.

The flower is made up of layers, stamped using the With All My Heart stamp set. The largest flower stamp in this set coordinates perfectly with the Fancy Flower Punch (the bottom layer on my project), but I punched it with the 5-Petal Flower Punch instead. It cuts a little off, but I love the look of it...and the extra versatility it lends to the stamp.

Supplies: With All My heart, Regal Rose ink & cardstock, Apricot Appeal cardstock, Whisper White cardstock, Basket & Blooms XL die for the Big Shot, Fancy Flower Punch, 5-Petal Flower Punch, 3/4" Circle Punch, Sticky Strip, Stampin' Dimensionals

Click HERE to Order Stampin' Up! Products Online, Anytime!

Thursday, February 18, 2010

Vintage Vogue Swing Card

Sorry I've been a little MIA this week. I'm still not over this little cold. It has taken it's toll on me and I saved up most of my energy for Stamp Club on Tuesday and again tonight. Here's one of the projects we made this week. I dug up this "Swing Card" from the archives and designed a new version using the Vintage Vogue stamp set from the Occasions Mini Catalog. You can find complete instructions to make this card over here on SplitcoastStampers.com.

The card fits in a standard Medium envelope. Here it is, closed:

And when you pull on the sides, the center swings around to reveal the other side of the message.

It opens completely to lie flat with the second (back) side of the center message showing.

Supplies: Vintage Vogue, Very Vintage Jumbo Wheel, Teeny Tiny Wishes, Elegant Eggplant ink & cardstock, Rose Red ink & cardstock, Always Artichoke ink & cardstock, Very Vanilla cardstock, Cutter Kit (distressing tool), Rich Regal Brads, 1/4" Rose Red Grosgrain Ribbon, 1/4" Very Vanilla Grosgrain Ribbon

Click HERE to Order Stampin' Up! Products Online, Anytime!

Tuesday, February 16, 2010

Valentines for the Kids

Here are the valentines I made for the kids this year. Nothing too fancy, but I wanted to convey our love for them as individuals. I look the pictures the day before Valentines' Day, so they are very recent. My hope is to create similar type of valentine for them each year so that they can save them and have a record of what they looked like and what they were doing each year.

The inside had a list of five things that we love about them. Obviously each list was different. This one is Elise's.

I love that the Scallop Square die is clear! I printed the list of things we love on Whisper White cardstock and then lined up the die before I cut it so that it was perfectly centered the way I wanted it. Then I stamped a heart next to each item.

I signed and dated the back of each card.


Supplies: Things I Love**, Schoolbook Serif Alphabet, Love You Much, All Year Cheer II (retired), Melon Mambo ink/marker & cardstock, Pretty in Pink ink & cardstock, Bordering Blue ink & cardstock, Night of Navy ink & cardstock, Heart to Heart Punch, Scallop Square Clear Die (Big Shot), Stampin' Dimensionals

** You can get Things I Love for FREE during Sale-a-bration with a qualifying order or workshop! Click here for details.

Click HERE to Order Stampin' Up! Products Online, Anytime

Sunday, February 14, 2010

Happy Valentine's Day!

As Valentine's Day comes to an end, I am still finishing up my special valentines for the children. I'll have to share them tomorrow. I'm still feeling a bit under the weather and spent most of the morning napping (thanks, honey!) instead of working on stuff. And then much of the afternoon playing with the kids instead of working on stuff (while my honey was napping!).

So I don't have anything new of my own to share with you, but I thought I'd take the opportunity to share some adorable valentines that my mom made for the kids. Wish you could see these in person. They are adorable! Following Shannon West's lead from Leadership Conference, Mom made these huge cardstock hearts that fold up (and can be sealed and mailed!). Inside is the valentine message:

She made a different card for each of the kids. You can see the others and her tutorial to make these heart cards on her blog here.

And while I'm sharing blogs, you have to check out Mary Ellen's blog for the perfect chocolate chip cookie recipe. I made some this morning and they are amazing! It took a little longer than my normal from-scratch recipe, but it was worth the labor of love!

I hope you had a great Valentine's Day and I'll be back tomorrow with something new (of my own creation!) to share with you!

Click HERE to Order Stampin' Up! Products Online, Anytime!

Saturday, February 13, 2010

Vintage Vogue CASE

I CASEd this card designed by Cheryl Soerensen for our demonstrator shoebox swap last month. Cheryl's card was originally monochromatic, but I wanted a little more color, so I used the color combination from Rae Anne Littrell's card from the same shoebox swap. I love it when I don't have to think! (wink!)

Supplies: Vintage Vogue, Very Vintage Jumbo Wheel, Rose Red ink & cardstock, Always Artichoke ink & cardstock, Elegant Eggplant ink & cardstock, Very Vanilla cardstock, Scallop Trim Border Punch (SAB), Rhinestone Brads, 1/4" Rose Red Grosgrain Ribbon

Click HERE to Order Stampin' Up! Products Online, Anytime!

Friday, February 12, 2010

Happy Together Love Birds Card

I whipped up this little 4-1/4" x 4-1/4" square card earlier this week with Stacey's Curtain Call Color Challenge #16 in mind. And since I'm a little under the weather now, this may just end up being my hubby's Valentine's Day card. I don't feel up to making another one, so I hope he likes these love birds!

For tips on using the Scallop Trim Border & Corner Punches, check out this post from last week.

Supplies: Happy Together, Very Vanilla cardstock, Kraft cardstock, Real Red ink & cardstock, Sending Loving Designer Series Paper, Two-Step Bird Punch, Scallop Trim Border Punch (SAB), Scallop Trim Corner Punch, Heart to Heart Punch, Stampin' Dimensionals

Click HERE to Order Stampin' Up! Products Online, Anytime!

And the winner is...

Thanks for all the great comments and blog name suggestions you've left over the past week. The majority of you think I should keep the name the same, so I think that's what I'm going to do!

This afternoon, I used random.org to select a winner for my 300K Blog Candy and the lucky stamper is Brandi!
February 6, 2010 10:25 AM, Brandi said...

Hi Julie. I visit everyday and love, love, love your stuff. When taking to people about you fabulous blog I always call it Julie's Stamping Spot. I think it would be a shame to change it. Just my 2 cents.

Brandi, please email me your mailing address and I will get your Whimsical Wings Card Kit in the mail.

If you didn't win, you can still purchase the Whimsical Wings Card Kit and make these cards for yourself at home. Click here for details on the card kit. It includes TWO stamps and enough cardstock and envelopes to create six cards.

Thanks again for visiting my blog! I hope you'll keep coming back for more!

Click HERE to Order Stampin' Up! Products Online, Anytime!

Thursday, February 11, 2010

One More Paper Flower

I'm going to keep it short and sweet tonight so I can get to bed a little early. Here's one last paper flower card. This is one we made at my last downline meeting. Click here for the tutorial to learn how to make these paper flowers.

Supplies: Whimsical Words (SAB), Whisper White Craft ink & cardstock, Tempting Turquoise cardstock, Certainly Celery cardstock, Kaleidoscope Designer Series Paper, Sherbet Designer Buttons, 5/8" Certainly Celery Grosgrain Ribbon, 1-3/4" Circle Punch, Eyelet Border Punch, Perfect Polka Dots Impressions Folder (Big Shot), Sticky Pages, Stampin' Dimensionals

Click HERE to Order Stampin' Up! Products Online, Anytime!

Wednesday, February 10, 2010

Eyelet Border Paper Flower Tutorial

Don't you love these paper flowers?! I put together a tutorial based on the concept that Jan McClurg shared at the Phoenix Regional seminar. Click here for my tutorial so you can make your own paper flowers and make Spring come a little early!


Here's another card I made using this technique. I picked some spring colors to bring a little sunshine to our otherwise snowy winter day yesterday.

Click here to see my other paper flower card and stay tuned for one more to come!

Supplies: Short & Sweet, Itty Bitty Backgrounds*, Regal Rose ink, Whisper White cardstock, Pretty in Pink ink & cardstock, Apricot Appeal cardstock, Kaleidoscope Designer Series Paper, Eyelet Border Punch, 1-3/4" Circle Punch, Whisper White Organza Ribbon, Button Latte, Top Note die (Big Shot) Sticky Pages, Stampin' Dimensionals

*You can get Itty Bitty Backgrounds for FREE during Sale-a-bration with a qualifying order or workshop! Click here for details.

Click HERE to Order Stampin' Up! Products Online, Anytime!

Monday, February 8, 2010

Eyelet Border Paper Flower: Happy Birthday Card

Here's a card we made in my Stamp Club last month. This Eyelet Border Paper Flower technique was demonstrated by Jan McClurg at the Phoenix Regional Seminar as a Workshop Wow. I wasn't there to see it myself, but my friend Mary Ellen Stites took good notes and demonstrated it at our group meeting after Leadership. (Thanks, M.E.!) Come back tomorrow for another card with this technique and a tutorial so you can learn how to make one yourself!

Supplies: Teeny Tiny Wishes, Certainly Celery ink & cardstock, SO Saffron cardstock, Whisper White cardstock, Tea Party Designer Series Paper, Sticky Pages, 1-3/4" Circle Punch, 5-Petal Flower Punch, Modern Label Punch, Word Window Punch, Whisper White Satin Ribbon, Perfect Polka Dots Impression Folder (Big Shot), Sherbet Designer Buttons, Stampin' Dimensionals

Click HERE to Order Stampin' Up! Products Online, Anytime!

Sunday, February 7, 2010

Create and Inspire Charm Insert

I am participating in a charm swap with some other demonstrators. Actually, it's a swap for the charm inserts to go inside our new Simply Adorned charms. These charms are so small that it's kind of a challenge to come up with some creative layering. Not a bad challenge, definitely a fun one! Here's what I came up with for one of my swaps. What do you think?

This is for a 1" x 1-1/4" charm. Click here to see the other charm insert I designed and for more info about the Simply Adorned line.

Supplies: Friends 24-7, Define Your Life, Versamark ink, Chocolate Chip ink, Kraft cardstock, Ruby Red marker & cardstock, Old Olive marker, Very Vanilla cardstock, 2-Way Glue, Dazzling Diamonds

Click HERE to Order Stampin' Up! Products Online, Anytime!

Saturday, February 6, 2010

Square Top Note Thank You

Courtney Whitehead showed us some tricks with the Top Note die at our group meeting last week. I love finding other uses for things, so I was all over these alternate shapes! For this card, I used the Top Note die to cut my cardstock, then I turned the cardstock 90 degrees and cut it again to create this square-like shape. If you turn it 45 degrees and cut again, you'll send up with a circle shape! Maybe you have to turn and cut twice more...play around and have fun with it!

Here's what it looked like after I cut it the second time. You can see the original Top Note shape. The ends that are cut-off would be great to use a card or scrapbook page as brackets!

I only used one stamp on this card -- the thank you sentiment from Thank You Kindly. You can choose this stamp set as your free gift during Sale-a-bration with a qualifying order or workshop. I LOVE that Stampin' Up! has given us even MORE choices this year -- over 70 (!!) stamp set to choose from. Check out the list in the Sale-a-bration brochure here.

The colors of this 4-1/4" x 4-1/4" card were inspired by Stacey's Curtain Call Color Challenge #15. It's a unique combination that I think makes this card very bold and bright.

Supplies: Thank You Kindly, Garden Green ink & cardstock, Pumpkin Pie cardstock, Lavender Lace cardstock, Whisper White cardstock, Pumpkin Pie Patterns DSP, Top Note die for the Big Shot, Fancy Flower Punch, 5-Petal Flower Punch, Sherbet Designer Buttons, Mini Glue Dots, Stampin' Dimensionals

Click HERE to Order Stampin' Up! Products Online, Anytime!

Friday, February 5, 2010

300K Blog Candy

Yesterday's blog traffic brought the hit counter past 300,000 hits! WOW! Thanks for visiting my blog and checking in with me each day for your daily dose of Stampin' Up! inspiration!

To celebrate this milestone, I'll be giving away some blog candy: one of my Whimsical Wings Card Kits, complete with Butterfly Accent & Dot, Dot, Dot stamps!! You can purchase this kit for yourself here. And if the randomly chosen blog candy winner has already purchased this card kit, I'll send an alternate gift instead!

Leave a comment on this post to be entered in the drawing for the card kit. I'll chose one random winner next Friday, February 12 after Noon (Central Time).

** I need your help! ** When I first started this blog, I put up the working title "Julie's Stamping Spot" with the intention of coming up with another name. And here we are, almost two years later and I still haven't decided on a new name. I would love to hear your ideas! When you comment for the blog candy, please include your suggestion(s) for a new blog name. (By the way, the address will remain the same: juliedavison.com or juliedavison.blogspot.com -- so don't worry, you'll still be able to find me here!)

And for more for my record more than anything else, here are the latest blog stats, as of today, 2-5-10:
  • Days Blogging: 628
  • # of Posts: 577
  • # of Hits: 301,462
  • Stamping Top 500 Rank: 73
Click HERE to Order Stampin' Up! Products Online, Anytime!

Thursday, February 4, 2010

Sweet Hearts Treat Holder

Here's a project I designed just for the demonstrators at my group meeting on Tuesday. It's a little treat holder that has a bag of SweetTarts inside! The dimensions of the holder are 4" x 10-1/4". Score are 4", 8", and 8-1/2". The small part folds up to the inside and is secured with two brads to create a pocket for the treat.

The flap is held shut by the White Grosgrain Ribbon wrapped around and tied. I looped it through the holes on the Scallop Trim Border. (Love that tip I got from Flo D'Elia at our shoebox swap last month!)

Speaking of tips, I have a couple to share about the Scallop Trim Border & Corner Punches. I was so excited to see these coordinating punches in the Occasions Mini Catalog and I got them right away. But using them is not quite as easy as I expected. It takes a little practice, but the results are worth it! Check out this great new video tutorial from Stampin' Up! to learn how to use the border and corner punches on any size cardstock.


This is just one of many video tutorials you can find on Stampin' Connection, a new online community exclusively for Stampin' Up! demonstrators. I love Stampin' Connection! In addition to the resources from Stampin' Up!, there are thousands of project photos and videos posted by other demonstrators. It's all Stampin' Up! all the time. What are you waiting for?! Sign up to be a demonstrator like me so you can have access to all the cool stuff on Stampin' Connection too! Click here for details on the Sale-a-bration Sign-Up Special.

Back to those corner and border punches...If you're like me and looking for a "magic size" to pre-cut your cardstock to that will work, check out this tutorial from fellow demonstrator Gretchen Barron. I used her sizes and cut the square for this project to 3-13/16". I punched the corners first and then did one punch with the border punch on each side. So easy!

One important thing about the corner punch is making sure to line the cardstock up with the guides on the side and not to push it in too far. It should create a clean corner when you punch it and not have extra cardstock around the edges that needs to be trimmed off. If there's extra cardstock, you're putting the cardstock in too far.

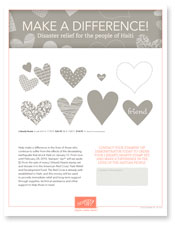
Phew! As if this wasn't long-winded already, I wanted to point out that the stamp set I used on this treat holder is I {Heart} Hearts and is part of the Making a Difference Campaign to raise money for the victims of the Earthquake in Haiti. When you purchase this stamp set by February 28, Stampin' Up! will donate $2 to the Red Cross. Click here for all the details.

Supplies: I {Heart} Hearts, Teeny Tiny Wishes, Melon Mambo ink & cardstock, Crushed Curry ink & cardstock, Bermuda Bay ink & cardstock, Whisper White cardstock, Scallop Trim Border Punch, Scallop Trim Corner Punch, Heart to Heart Punch, 1/4" Whisper White Grosgrain Ribbon, Stampin' Dimensionals

Click HERE to Order Stampin' Up! Products Online, Anytime!

Wednesday, February 3, 2010

Milk Carton Bird House

I wasn't going to get that darn ol' bird punch! You know, the cute one in the Occasions Mini Catalog that punches the bird, wing, and branch all at once. (Extra Large Two-Step Bird Punch, #117191, $15.96) I was doing great to resist the purchase...until I saw this project!

I first saw this bird house made from the Mini Milk Carton die (#117310, $32.95) on Jackie Topa's blog in December. She is some kind of creative genius, I swear! It was my downline Barb Hopper's version that she swapped at Leadership Conference that I CASEd for Stamp Club...and a downline meeting. In total, I prepped for 60 of these little bird houses. Actually, I have to give credit to my hubby! HE die-cut and textured 60 of these milk carton boxes to help me prep for this project. He is the epitome of "supportive husband" and I love to brag about it. I've said it before -- I couldn't do what I do if it wasn't for his love and support...and at times like this, literally his HELP!

Ok, a few details on the bird house and then I'm off to recline on the couch! As I mentioned, the bird house is the Mini Milk Carton die (#117310, $32.95) cut out from Kraft cardstock and texturized with the Texturz Plate Kit #4. Fold on all the score lines. With the small flap on your left, fold up the second bottom flap and punch a 1" circle in the middle. (Don't worry: the bottom flap will get covered by the other bottom flaps so no one will see that hole!)

Apply sticky strip as shown above and assemble the box. (The bottom flap with no adhesive ends up being the very bottom of the box.) Staple the top, leaving a space in the middle. The roof is 2" x 4", folded in half. I used the Sale-a-bration Scallop Trim Border Punch on the edges. Place it on top of the house and punch a 1/8" circle between the two staples (which are now covered by the roof). Tie Hemp Twine. Instead of designer paper on the wing, I sponged Not Quite Navy ink on the same color cardstock and popped it up with a dimensional. Stick a bag of candy inside (or bird seed or sunflower seeds!) or use a Window Sheet to cover the opening and put the candy right in.

Don't have the Milk Carton die? Try turning the 2-4-6 box into a bird house. Click here for instructions on making a 2-4-6 box.

Supplies: Not Quite Navy ink & cardstock, Kraft cardstock, Always Artichoke cardstock, Chocolate Chip cardstock, Scallop Trim Border Punch, Extra Large Two-Step Bird Punch, Mini Milk Carton Die, 1" Circle Punch, Sticky Strip, Stapler, 1/8" Hole Punch, Hemp Twine

Click HERE to Order Stampin' Up! Products Online, Anytime!

Monday, February 1, 2010

Small Wonder Cards

I've been packaging up Whimsical Wings Card Kits to send out this week and will be including this card as my thank you note. They are 4-1/4" x 4-1/4" square cards accented with the Beautiful Wings die-cut butterflies. I couldn't decide which layout I liked best: having three grouped together on the top note or two on the top note and one more by the greeting. What do you think?

I actually made this card before the card kit and the colors from the Shades of Spring Designer Series Paper inspired the color palette for the card kit. It's not too late to order the card kit. Click here for more information and "click to buy" links.

Supplies: Whimsical Words (SAB), Orchid Opulence ink, Whisper White cardstock, Pretty in Pink cardstock, Certainly Celery cardstock, So Saffron cardstock, Shades of Spring DSP, Scallop Trim Border Punch (SAB), Top Note die for the Big Shot, Beautiful Wings Embosslit, Stampin' Dimensionals

Click HERE to Order Stampin' Up! Products Online, Anytime!

Free Stamp Set of the Month: Love Bug

Thanks to everyone who placed an order with me in January! I drew one winner from all of the online and email orders and Gail S. from Wilmington is the lucky stamper to win the Love You Much stamp set! Congratulations, Gail!

It's a new month and time for a new free stamp set giveaway! Each month, I will give away a free stamp set. To be eligible for the drawing, all you have to do it place an online order (email orders count too!) that is not part of a club or workshop. You'll get one entry for each order that you place with me between February 1-28. I'll draw a winner on March 1st. This month's stamp set is Love Bug, a current hostess set. You can also earn this set of 6 for FREE when you host a workshop. Call or email me to schedule your next party!


Check out these samples using Love Bug that I posted on my blog in recent months: Welcome Baby Bug Card | Birthday Bonanza

Ready to place an order now? Click here to go right to my online store and shop from the convenience and comfort of your home.

Click HERE to Order Stampin' Up! Products Online, Anytime!